In this tutorial, you will learn how to bring 3D drone scans into cmBuilder. Although the below example only shows the process using Drone Deploy this guide is generally applicable to Propeller and Pix4D too.
Export an OBJ file
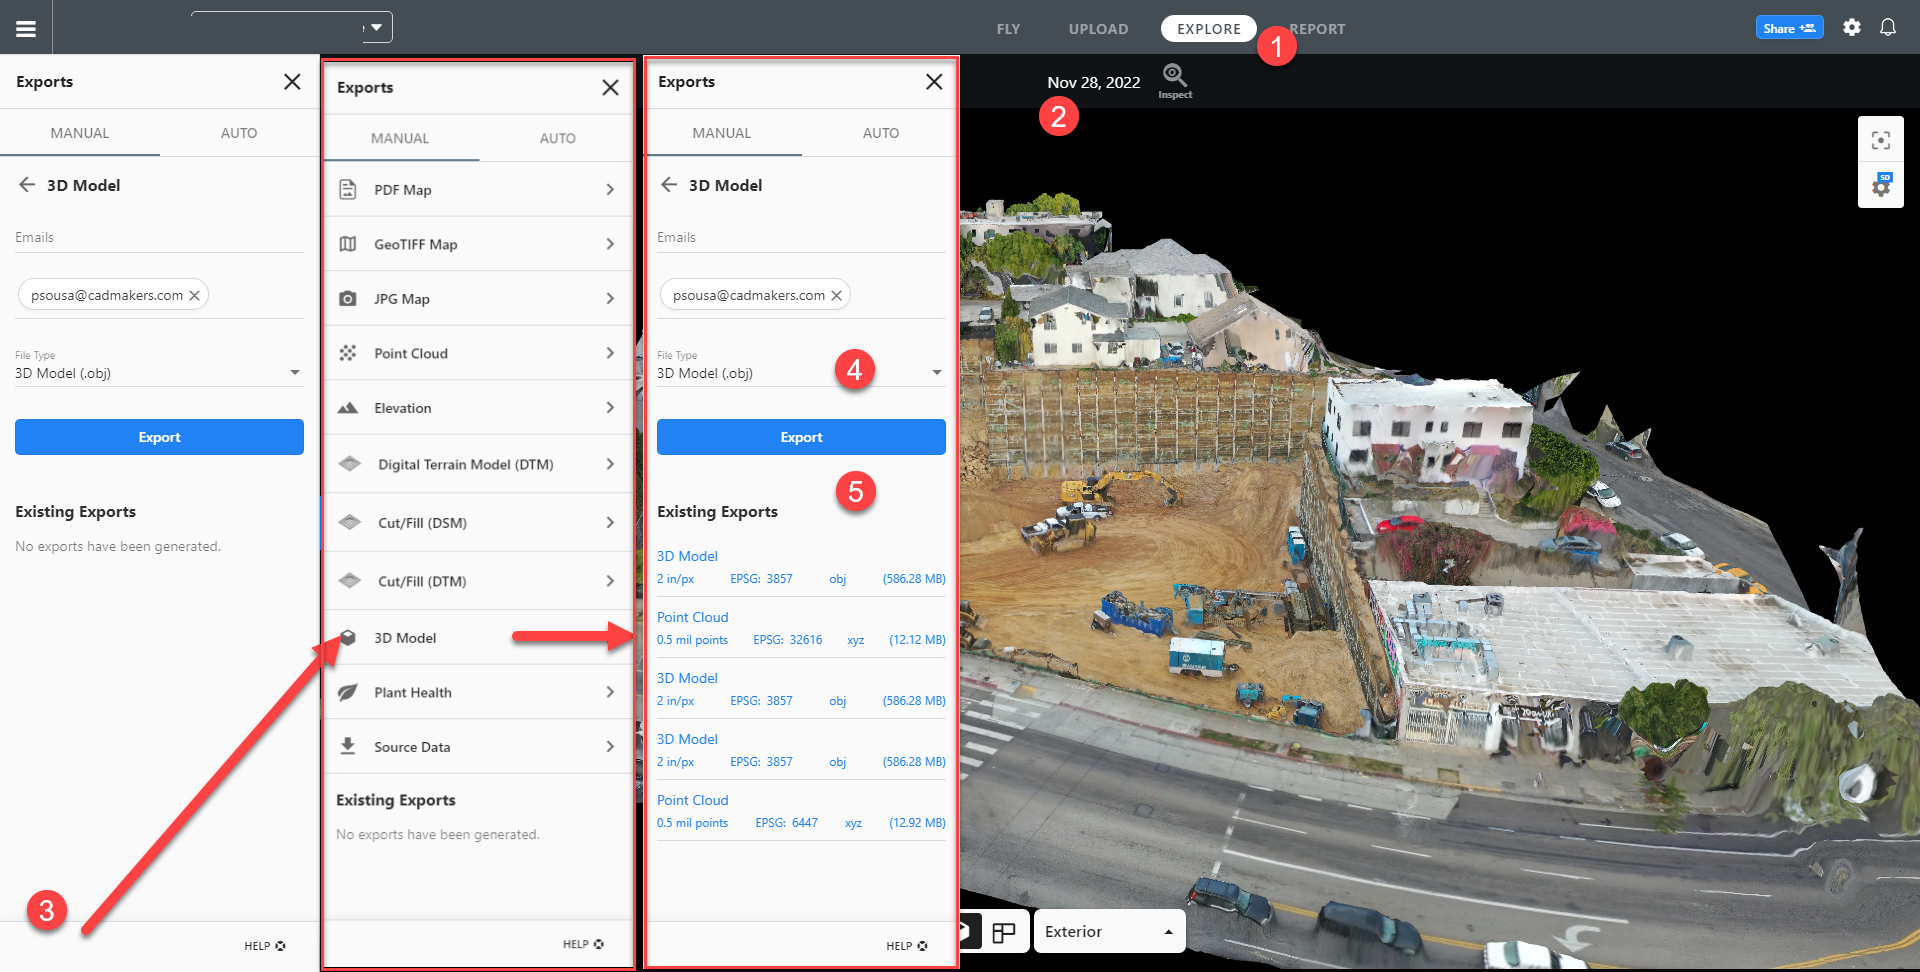
1. Open Drone Deploy and access the Explore tab.
2. Select the date of the 3D scan you would like to export.
3. Click Export and then 3D Model on the left side sheet.
4. Select OBJ for the File Type.
5. Click on Export and you will receive an email with a link for download and it will also show up under Existing Exports.
6. Export the downloaded file to a local folder. It will contain an MTL, an OBJ, and several JPG files.
Converting to FBX
You will need to use other software to convert the OBJ file into an FBX file with the embedded textures. In this tutorial, we will cover two options: Recap Photo (only for version 2025 or older) and Blender.
Using Recap Photo (only for version 2025 or older)
- This is the recommended workflow if you have a license to Autodesk Recap Photo, as you can edit the meshes quickly and clean up what is to be imported.
- https://vimeo.com/789098250/d899dd8da6
Using Blender
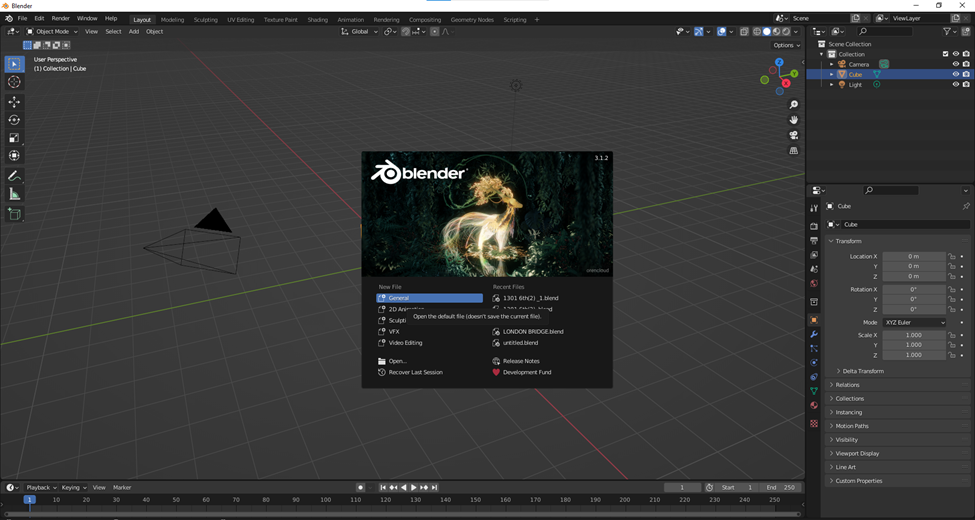
1. Download and install Blender, a free 3D modeling software. Open Blender and click on General:
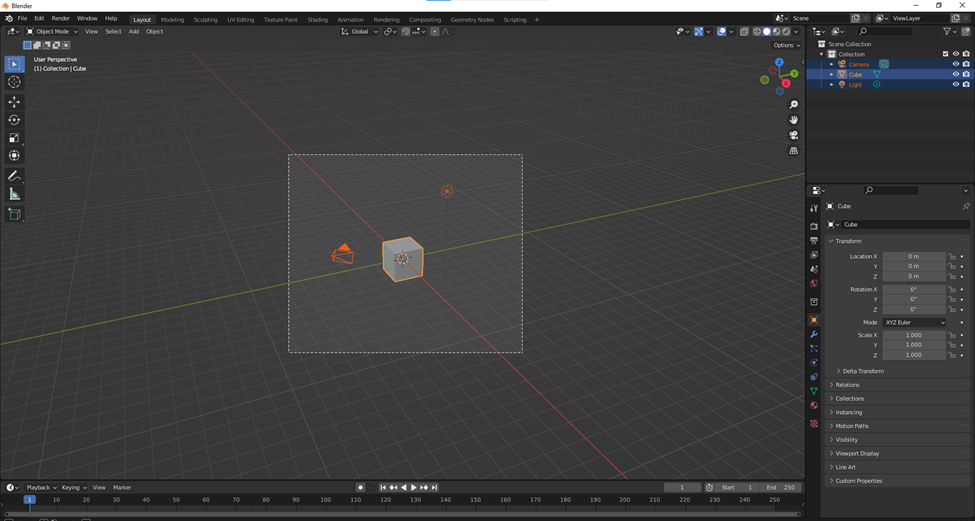
2. Select the default items on the screen and delete them:
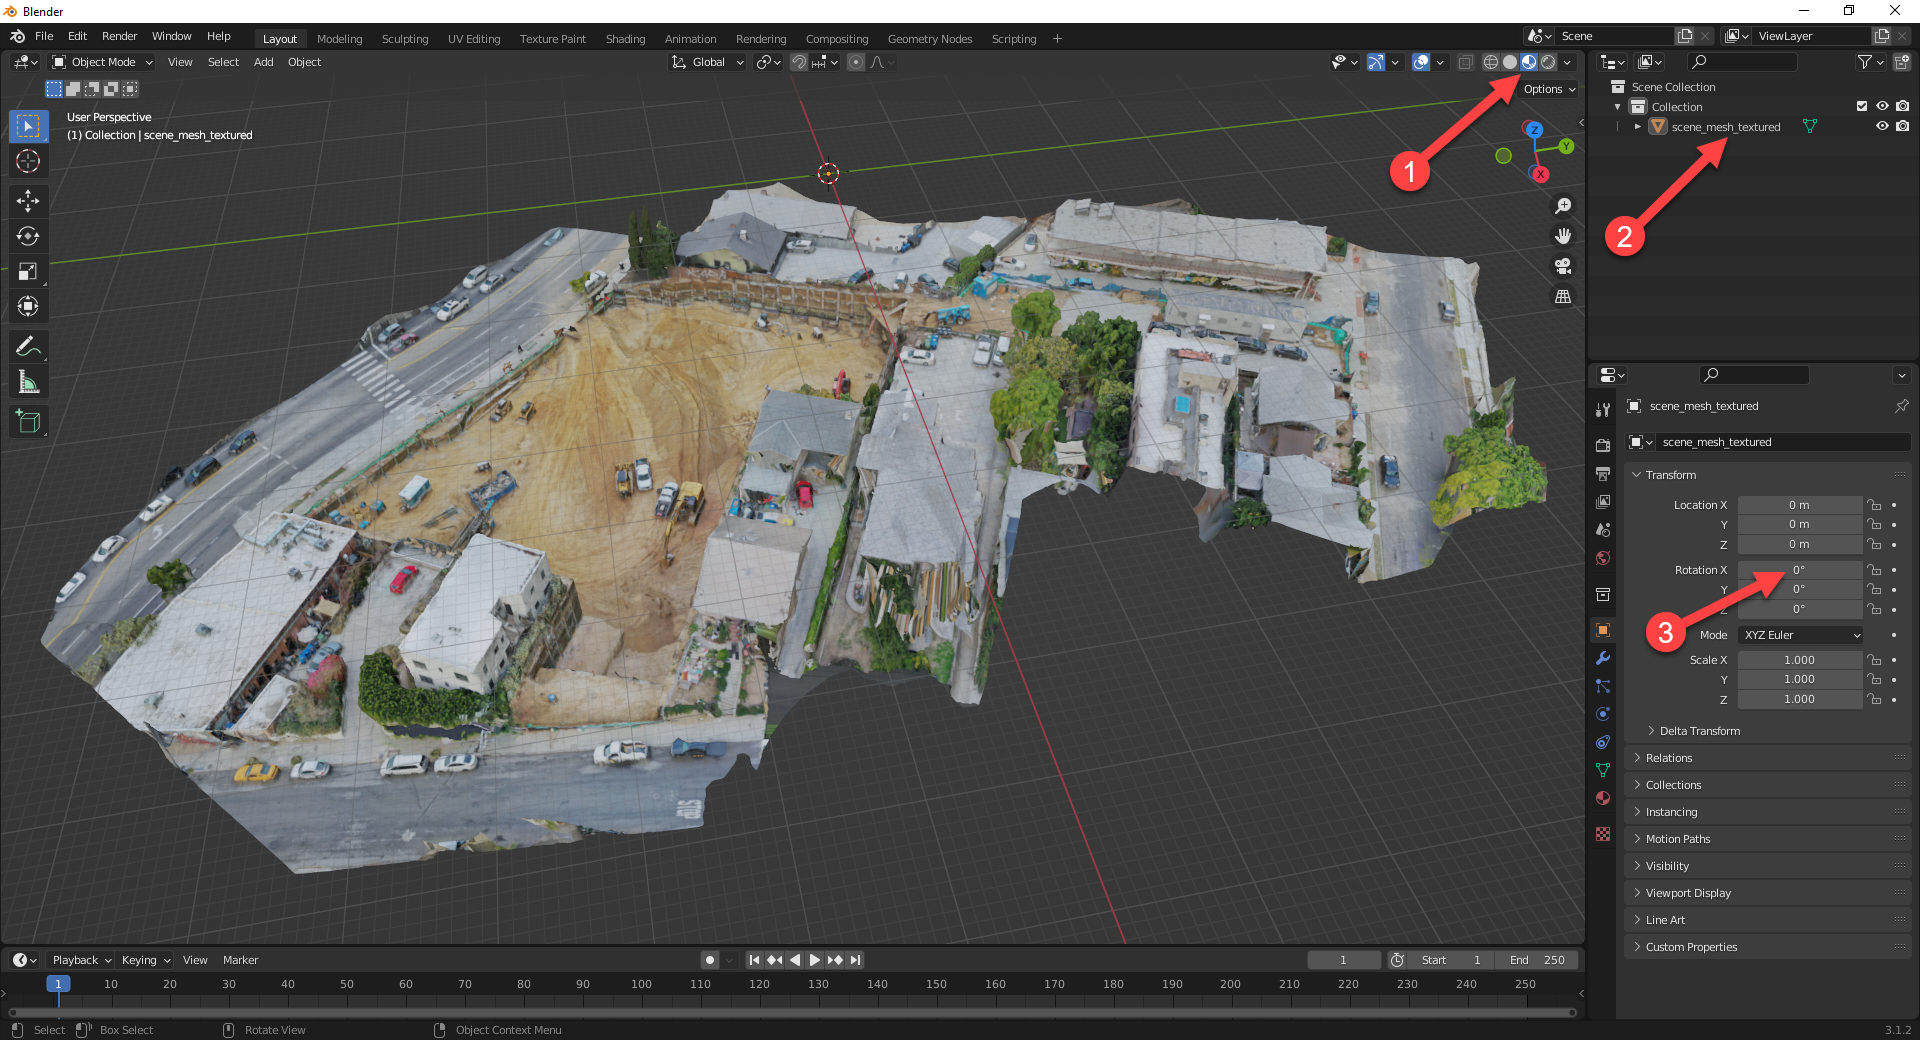
3. Click on File > Import > Wavefront (.obj) and select the OBJ file you downloaded from Drone Deploy (note: the loading indication for the Blender is a black square in your cursor). The imported model will show up rotated and gray by default.
Make sure to keep the MTL and JPG files in the same folder as the OBJ model as Blender needs them to map the textures correctly.

4. Here are the instructions to adjust:
- Click on the Material Preview button to turn on the textures
- Select the imported model from the list
- Set the X Rotation to 0°
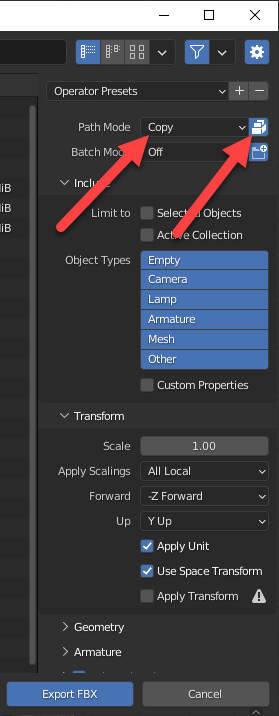
5. Click on File > Export > FBX (.fbx) and set up the Path Mode to Copy and click on the Embed Textures button.
6. Import the FBX model in cmBuilder using the instructions on this page: 4.1 BIM Model
Reduce Texture File Size for Drone Scans
If your OBJ has a highly detailed texture it may be slow to work with, in fact Material combiner may fail if the file is too large. Read below to learn how to use a Python script to reduce the quality of textures (and thereby the file size) of drone scan OBJ mesh file in Blender so that they are easier to work with. Follow the steps below to download, insert and run the python script:
- Download this Python script file and open it as text file using Notepad or similar: 📥Download Python Script
- Open Blender and import the drone scan as an OBJ file.
- In Blender you will need to open a text editor side panel. This can be done by moving the cursor to margin area between existing panels until you see a crosshair then clicking and hold the left mouse button and dragging the mouse to the left, a new panel divider will appear as you drag your mouse (we recommend click the margin area just outside the upper right corner of the 3D work area, see GIF below). When the new Panel appears click on the editor type drop down, select "Text Editor" from the available options, then click the "+ New" button.
-
Copy the text in the text file and paste it into the Blender Text Editor. Note the target height and width in the code (1). You may modify the values if you want but 1024 is a good value for both. Click the Play button (2) to run the script, it may take a moment to run.
- Close the text area by right clicking in the header area of the panel (blank space next to the play button) and select close area.
- Continue with any edits you need to carry out on the file.
Comments
Please sign in to leave a comment.