In this tutorial, you will learn best practices to export a 3D model from Navisworks (NWD file) for use in cmBuilder.
Part 1 - Preparing and Exporting the NWD File
1.1. Use Navisworks 2026 or Later
Only Navisworks 2026 supports the ability to exclude hidden elements when exporting to .NWD format. This ensures that irrelevant parts do not get imported into cmBuilder.
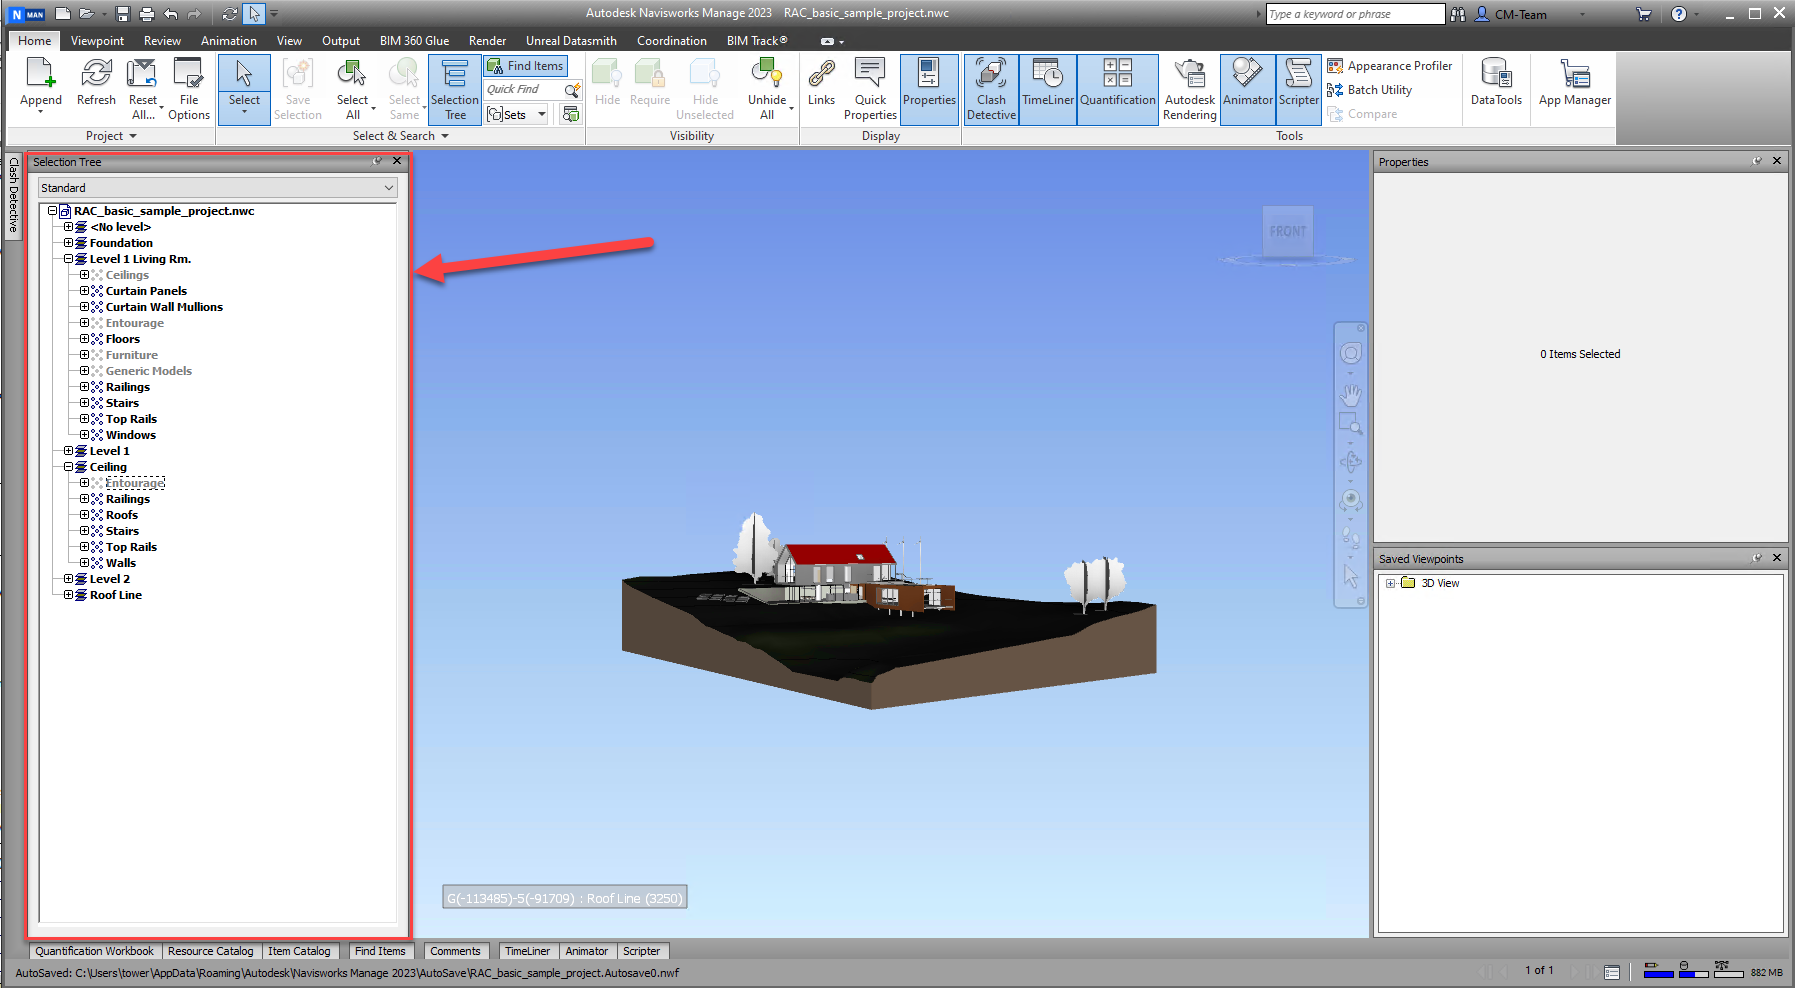
1.2. Open and Inspect the File
Open your file in Navisworks before uploading to cmBuilder:
- Check what geometry is included and review the model tree
- Identify hidden or misplaced elements: Use the Zoom Extents tool to identify parts far from your main model. Select and hide them to avoid skewing your model's bounding box in cmBuilder.
-
Check if the the scale is correctly defined:
Right-click the parent in the tree, and Units and Transform
- Enter a factor to transform the scale in the x, y, and z directions
💡Note: NWC/NWD files are compressed and may contain far more geometry than their file size suggests.
1.3. Detect Geolocation
To check if the model is geolocated:
- Open the Measure Panel (1) in Navisworks and take any measurement
- If coordinates show very large values (2), it is probable the model is geolocated
-
Refer to Geolocation Instructions in this User Guide
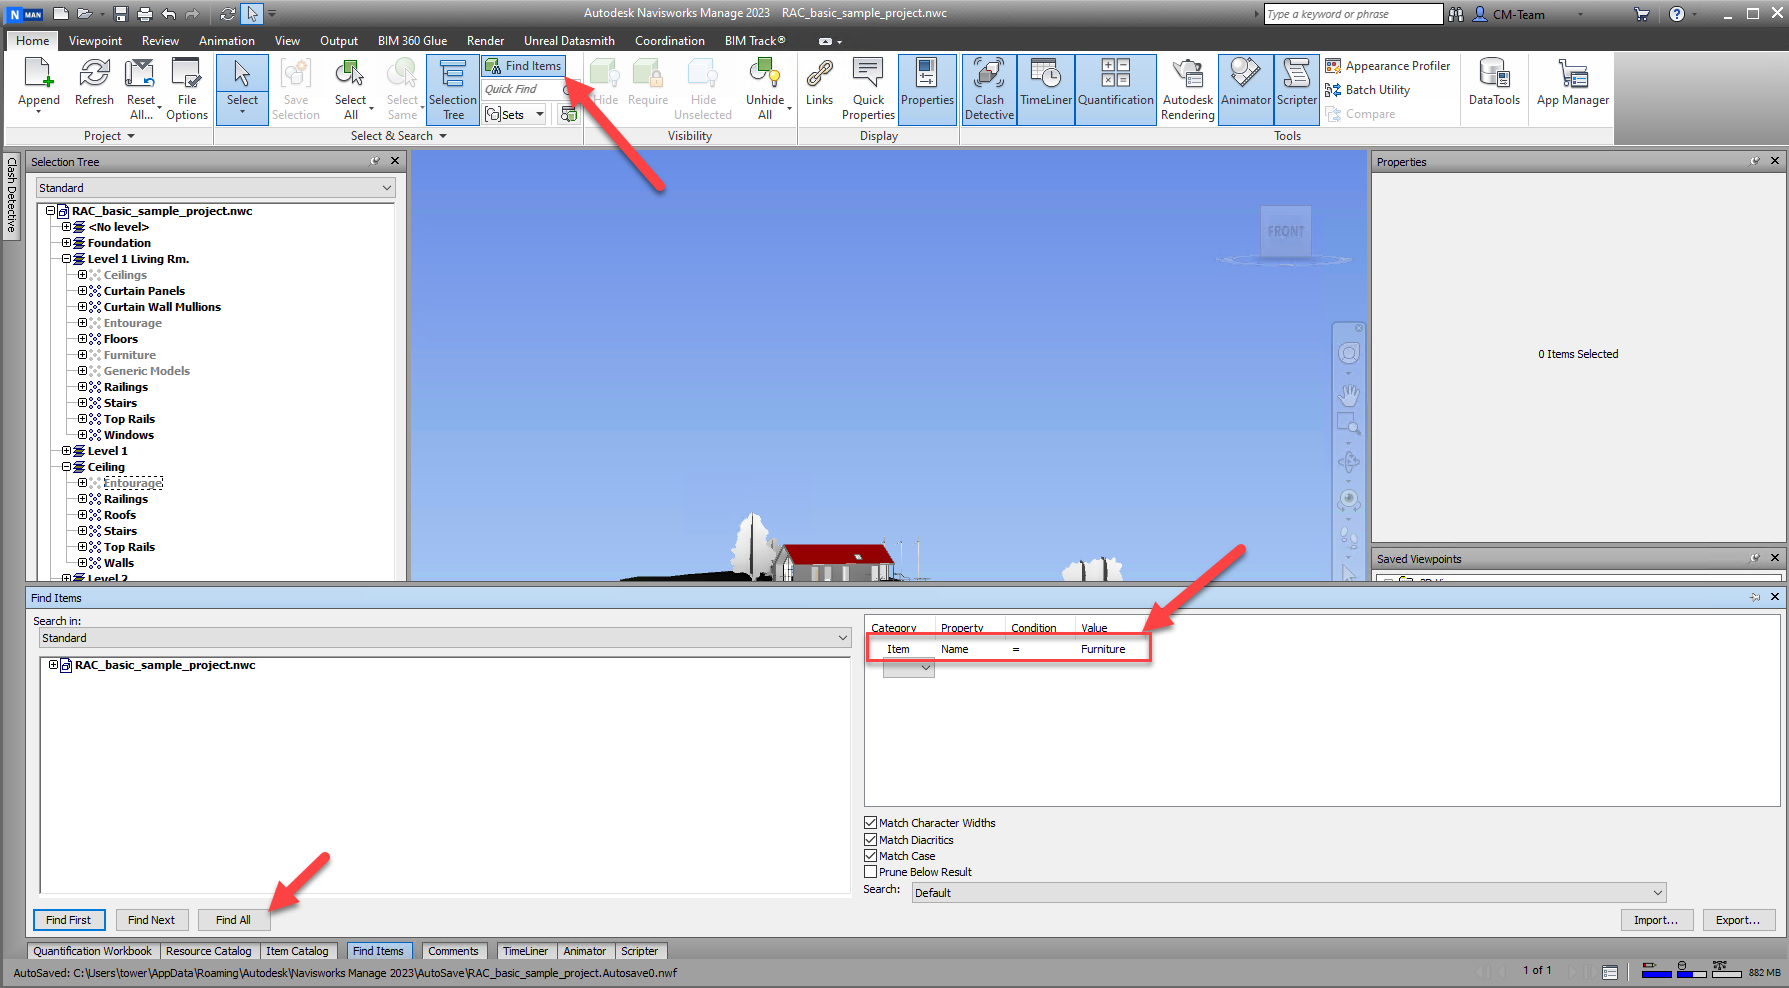
1.4. Filter Elements With Search Sets
Use Find Items to filter out unnecessary parts (e.g., furniture, ceilings) based on name or property and hide these parts before export.
💡 Section planes in Navisworks are visual tools only. They do not exclude geometry from exports.
1.5. Exporting the Model
- In Navisworks, go to Output > Export Scene > NWD (1)
- Make sure Exclude Hidden Items (2) is selected
- Save the file for import into cmBuilder.
Part 2 - Working with the file in cmBuilder
2.1. Import the Model
- Open a Scenario
- Click Buildings > BIM Import
- Upload your .NWD or .NWC file
If your model is geolocated, confirm that the Project Coordinate System is set correctly in Project Settings. Once uploaded, your model will appear in the correct location and orientation.
Refer to this article for more instructions: 4.1 BIM and Scan Models
2.2. Reviewing Model Structure in cmBuilder
cmBuilder allows you to view the model in two ways:
BIM Structure (Level & Class)
- Organizes parts by level (e.g., L1, L2)
- Merges all matching levels across different disciplines
Original File Tree
- Replicates the Navisworks tree structure
- Ideal for granular selection and reference
💡Note: Use the right view depending on whether you're sequencing or managing specific model segments.
Refer to this article for more instructions: 0.10 Model Browser (Tree)
FAQs:
Q1: Some parts or faces in my NWD export are missing. How can I fix this?
- When exporting NWD, the faces are visible from one direction, but transparent or invisible from the other. The direction the face is visible from is called the face normal. Normals determine the direction a face is oriented, and when exporting to formats like NWD, sometimes the normal can flip, causing one side of the face to be transparent or not rendered properly.
- This can be easily fixed in cmBuilder by right clicking on your BIM model (1), selecting Edit BIM Model (2), and turning on Show material on both sides (3) as seen in the image below.
Comments
Will there be any plans on including selection sets as a selectable item in the tree structure? This way I can tie already created selection sets in Navisworks to milestones connected to the schedule on CMB.
Please sign in to leave a comment.