Available with the Following Subscriptions: All Subscriptions
Available for the Following Roles: All Roles
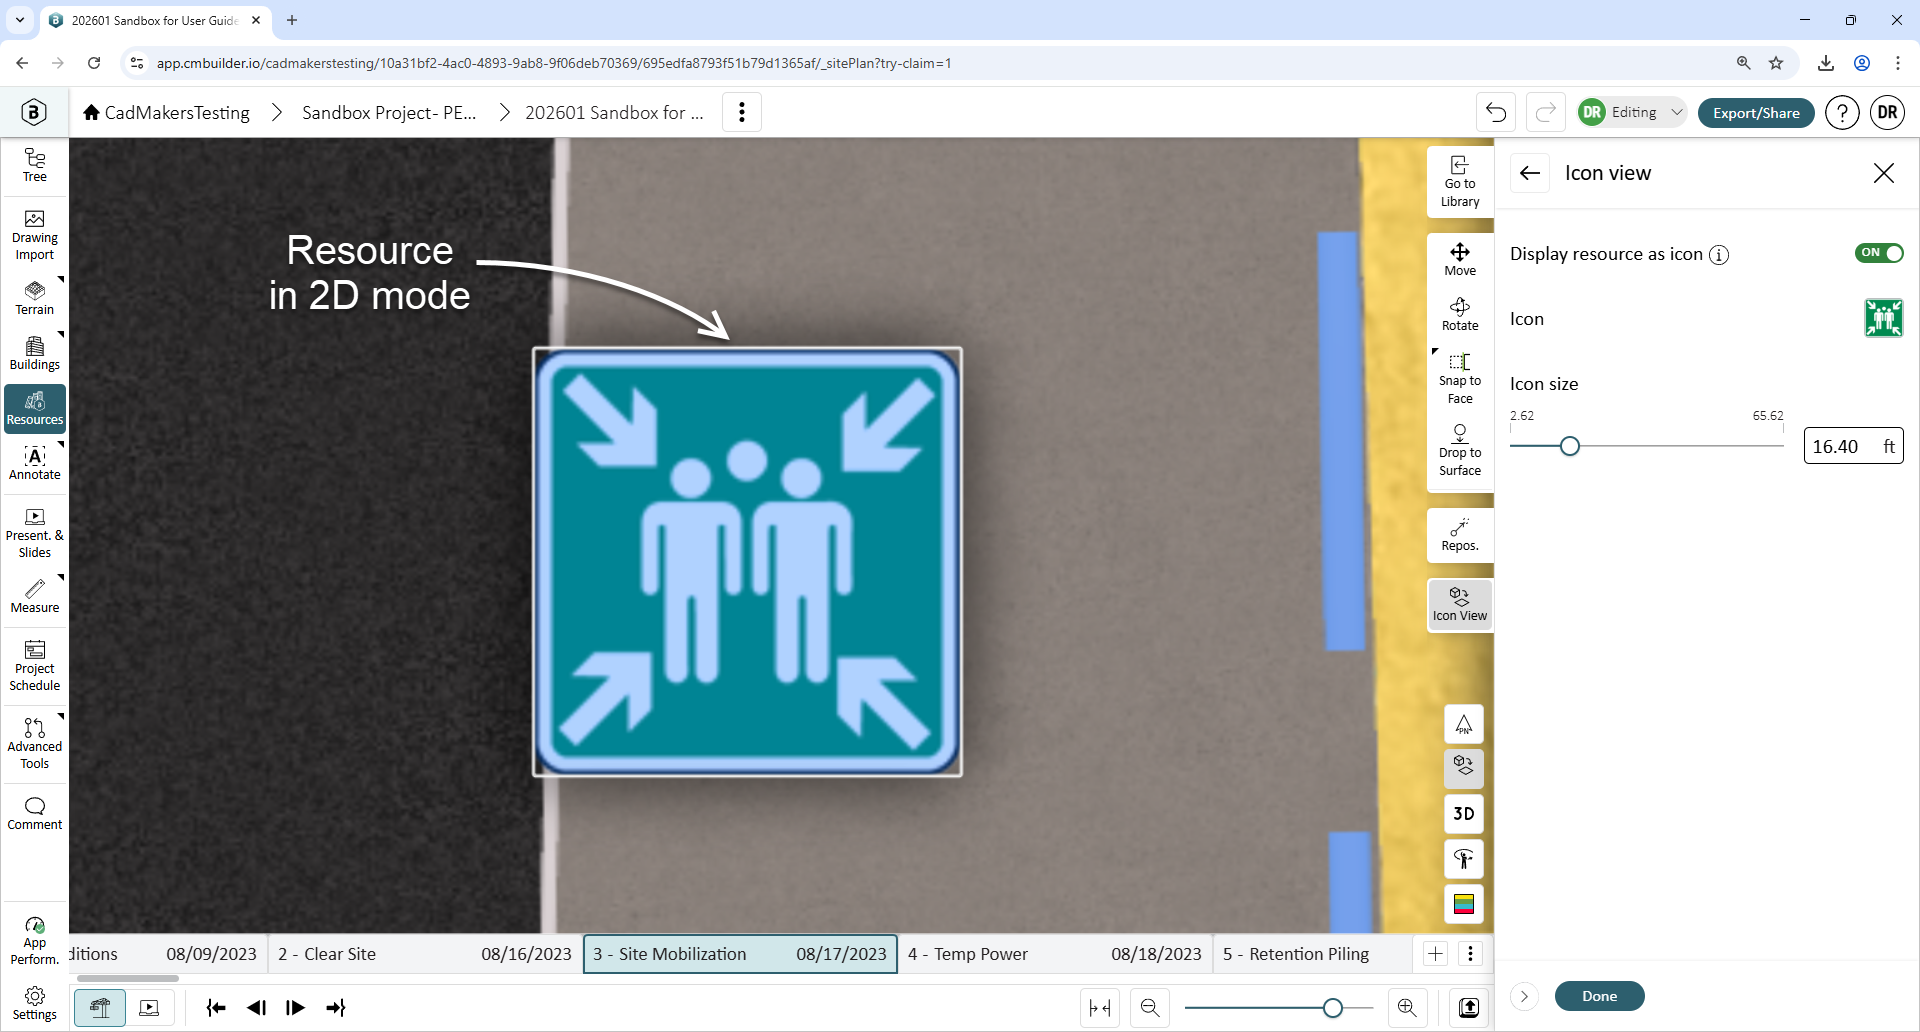
This guide explains how to use 2D Icon Mode to display Resources as icons. This feature is ideal for creating clear 2D (Plan) views, making thin or narrow elements like stop signs and fencing easily visible. It also helps streamline visuals and highlight key logistical details for easy communication with stakeholders.
In this article we cover:
💡 If you prefer to follow along a video, there is a video at the bottom of the page on this topic
Using 2D Icon Mode
Point Based Resources
-
Add a point resource
- Click Resources → Select the resource → Click to place on map (point) and your resource will load in the scene with the side sheet open.
-
If you already have a point resource uploaded, right click on the resource and click Edit and the side sheet will appear.
-
Click on 2D Mode Visuals
When you open the 2D Mode Visuals side sheet, it may be on or off by default depending on the resource.
-
If not on already, toggle on the switch to activate 2D icon mode for the Resource.
- An icon (1) will appear. By default, some resources have assigned icons. Click the icon to open the picker, where you can choose a new icon. Refer to the upload custom icon section if you are looking to add a new one.
- You have the option to adjust the scale (2) of the icon. Use the Scale Slider or the input value box to modify the icon's size. Note that scaling only affects the icon size, not the actual size of the resource in 3D view.
- A blinking cursor (3) will be visible on the 2D view button at the bottom-right corner. Hover over it to preview how the resource will appear in 2D view.
4. Click Done to confirm.
Line Based Resources
-
Add a line resource.
- Click Resources → Select a line resource such as fencing → Draw a line to place on map and your resource will load in the scene with the side sheet open.
-
If you've already added a resource, right click on the resource and click Edit and the side sheet will appear.
-
Click on 2D Mode Visuals. When you open the 2D Mode Visuals side sheet, it may be on or off by default depending on the resource.
-
If not on already, toggle on the switch to activate 2D icon mode for the Resource.
- A dashed line will appear in place of the line resource.
- There are option to adjust the color (1) of the line, and under stroke (2). You can customize the style, thickness and dash size of the line.
-
A blinking cursor (3) will be visible on the 2D icon at the bottom-right corner, previewing how the resource icon will appear in the top-down 2D view.
-
Click Done to confirm.
Upload Custom Icon
Some resources may not have icons. In this case:
-
- Premium and Enterprise subscriptions: You have the option to upload custom icons for any resource of your choice.
- All customers have the option to request icons to be added to a Resource, which works similar to Resource Requests. Our team approves and prioritizes these based on applicability.
Here is how to upload a custom icon:
Uploading icons for Resources without a default icon:
While you have the 2D mode visuals tab of the Resource side sheet open (with Show as icon when in 2D mode toggled On), click the "+" button and select your desired icon to upload. We support PNG, JPG, and JPEG images as 2D icons.
Uploading icons for Resources with an existing icon:
In the same menu as above, click on the icon in the side sheet to open the picker. Then, select the empty icon with the "+" button under the Custom Icons header. Select your desired icon to upload from your system.
Once uploaded, your custom icon will appear in the picker, and the scene will update to display the newly uploaded icon.
Turn on Icon mode
Click the Icon View (1) button on the bottom right corner of your screen, to turn on 2D Icon Mode. This will work regardless of whether you are in 3D or 2D view.
Switching from 3D to 2D View (2) automatically activates Icon Mode. You can either click the button 2D icon at the bottom-right of the screen or use the key shortcut Shift + T.
Request Icon for a Resource
Some resources currently do not have an associated icon. If you believe an icon would help represent it effectively in 2D view, consider requesting one. Simply hover on the info icon (1) to open the tooltip and click on Request icon (2) .
After clicking Request Icon, a side sheet will appear. You can describe your desired icon or simply click Submit in the footer. Once submitted, our team will review your request and get back to you.
Tips & FAQ:
User Workshop video covering 2D Icon Mode:
Follow along this video to learn how to use the 2D Icon Mode tool
Comments
Please sign in to leave a comment.